Need an easy to install                  
bird feeder pole system?
NO DIGGING NECESSARY!
 
FREE SHIPPING OVER $79.99 subtotal.
 
 
ORDER EARLY FOR THE HOLIDAYS
Unique-Birdhouses, Bird Feeders, Nature Gifts, Jewelry
 
Support Small Business
Bird Watching-A Great Alternative to Current Events
 

Please include phone number with Pay Pal orders if possible, thank you.
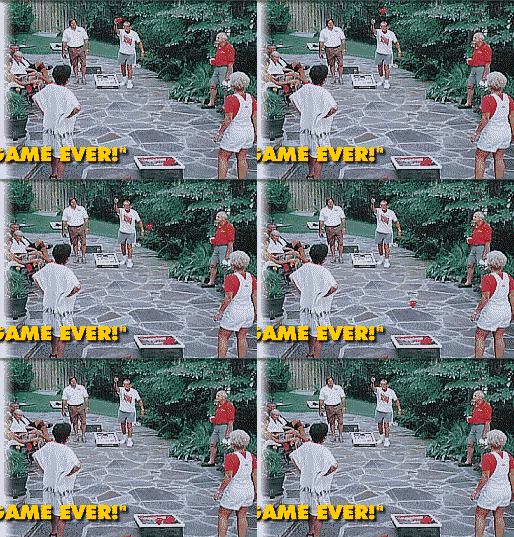
Backyard Bean Bag Games

beanbagmotionlogo.gif


Beanbag toss games are one of
THE HOTTEST GAME SWEEPING THE COUNTRY!!
Played like horseshoes,
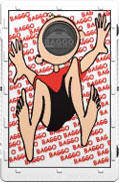
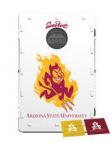
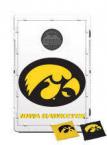
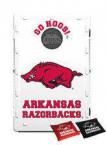
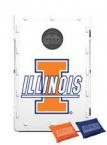
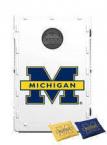
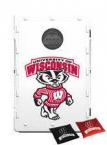
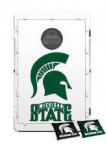
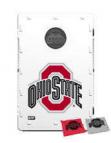
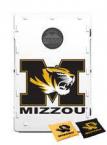
this HIGHLY COMPETITIVE bean bag game is ideal for the backyard, the beach, company picnics, youth groups, active seniors, tailgate parties, and campouts... wherever you want to have FUN! We have NCAA college and university bean bag toss games available as well. Make a great gift for college student too. Take pride in your favorite team.

The BAGGO game includes: Two official BAGGO game boards with life-time guarantee from the manufacturer, eight official bean bags, instruction booklet, wall mounting bracket (for storage & display), built-in scorekeepers, and a distance regulator. The Baggo Bean Bag Games fold and are lightweight and portable for easy transport.


How to Play Bean Bag Toss

Baggo is a combination of the skills required in bowling, horseshoes, and softball. The two Baggo bean bag toss game boards are placed on the ground facing each other. The distance varies according to age and skill level. Players stand alongside the board and toss a small bag at the hole in the opposite facing board.
A bag in the hole is a "Baggo" or 3 points.
A bag that lands on the board but does not go in the hole is 1 point.
A bag toss of equal value thrown against an opponent cancels out the opponent's points.
Rules

1. For 2 or 4 players. (2 Teams)
2. Place the boards approximately 20 feet apart.
3. Team partners face each other from OPPOSITE BOARDS.
4. Play starts at either board.
5. Each team plays with a set of 4 bags.
6. Opponents alternate toss until all 8 bags are played.
7. The round is then scored. (See Scoring)
8. Repeat play from the other board. 9. The scoring team has the honor of tossing first in the next round.
Baggo Scoring

A game = 21 points
. 3 points for each bag in the hole is a Baggo!
1 point for each bag on the board.
Score is the difference in the team totals. For example: After 1 round or 8 bags played; #1 Team with 1 bag in the hole = 3 points. #2 Team with 2 bags on board = 2 points. Score 1st round for #1 team = 1 point.
Bags pushed in by an opponent's toss count.
Selection of Players and Positions
A coin flip usually determines the side of the board where a player chooses to stand. After a completed game, the losing player has the choice of sides. The losing player or team has the option to switch sides or positions to minimize the effect of wind and sun. The winning team shoots first or has "honors".

Stance

Some players choose to stand along side the board with feet firmly planted behind the foot foul line, or elect to stride as they toss the bag. Others may wish to stand directly behind the board and toss, sacrificing distance for an angle reduction. Whatever the players stance, the opponent should always show proper respect for the players concentration by stepping back from the board until the player has completed his or her turn. A players toes must not project past the front edge of the board (foot foul line) when tossing the bag or a foot foul will occur.
Folding the Bag
Folding the bag is a key element in order to obtain consistency. There are no secrets to bag folding, just personal preferences. The "Chicago Fold" has been a favorite of the top tournament Baggo players. Hold the corner of the bag, let particulate drop to the bottom, fold in half and then fold in half again. The "Paducah Pancake" is one other most consistent folds among the underhand throwers. The bag is smoothed out and delivered flat or saucer like towards the hole. The "Half Paducah Pancake" is the same, only folded in half. "Sacramento Sling" is accomplished by holding the bag by the corner or edge between two fingers and then tossing underhand. An "Omaha Overhead" delivery is usually the choice of basketball shooters with the bag wadded up in a ball. The "Frisco Fling" has become very popular and is designed to give the shooter instant follow through techniques. Using your fingertips, gently hold the bag in the middle of one side of the bag. The particulate will stay consistently on the bottom of the bag. Then toss the bag underhand with the top of your hand upright.
Glossary of Baggo Terms:

Ace - A one point play, a bag on the board
Baggo - A 3 point play, a bag in the hole.
Blocker - An ace or a bag on the board positioned in front of the hole to prevent sliders.
Back Door - A Baggo tossed over a Blocker Bag.
Hanger - An Ace on the lip of the hole ready to drop.
Honors - The team that scored last tosses first or has the "Honors".
Foot Foul - Stepping past the front edge of the board while tossing.
Grounder - A bag on or touching the ground.
Mary Ellen - A toss that falls short of the board.
No Blood - A no score round
Shooter - The person currently tossing.
Slam - 4 Baggo's per player per round.
Slider - A Baggo that slides into the hole.
Swish - A Baggo that goes straight into the hole.
Skunk - An 11-0 game.


Things needed: to make your own bean bag toss game

Yardsticks
Paintbrushes
4X8 Sheet Of 1/4-inch Plywood
Circular Saws
Variable-speed Drills
Wood Glues
Sandpaper
7 Ft. Of 1-by-1 Boards
Paint
Drafting Compasses
1-inch Wood Screws
C-clamps
Bean Bags
Reciprocating Saws
Pencils


How to cut and design your bean bag toss game.
1 Purchase one 4-foot by 8-foot piece of 1/4-inch plywood and 7 feet of one-by-one board.
2 Use a yardstick and pencil to measure and mark out a line that divides the plywood sheet into two halves that each measure 4 foot by 4 foot.
3 Use a circular saw to cut the plywood sheet in half and set one half aside.
4 Use a yardstick and pencil to measure and mark out a line that divides one of the 4-foot by 4-foot plywood sheets in half diagonally. Saw the wood in half along this line.
5 Find the midpoint of the length of one-by-one and cut the length in half.
6 Determine the design of your game board and pencil it in on the 4-foot by 4-foot section of plywood. The design can be based upon a theme such as a child's birthday or can be based upon a favorite cartoon or television character or show.
7 Use a pencil, yardstick and compass to mark the placement and outlines of the beanbag holes. Each hole should be approximately 5 to 6 inches in diameter and large enough to allow a beanbag to pass through it easily.
8 Cut out the holes in your board with a reciprocating saw.

Assembling your bean bag toss game.

1 Make a series of pencil marks along the left and right edges of the game board's front to mark screw placement. Make the marks 1 inch apart and 1 inch from the side edges. Start your marks 3 inches from the top of the board and end them 3 inches from the bottom.
2 Turn the game board over and use a pencil to write the words "side", "top" and "bottom" on the board. Place the game board face down onto a flat work surface.
3 Center a length of one-by-one along one side edge of the game board, 1/2 inch from the board's edge. Use wood glue to join the two pieces together. Attach a C-clamp at each end of the glued-on piece of wood to hold it in place.
4 Turn the board over and use a variable speed drill to insert 1-inch wood screws at the spots marked in step 9. Reposition the C-clamps so that they do not interfere with the screws, or drill and remove the mps after all the screws are in.
5 Turn the board face down again and place one diagonally cut piece of plywood upright so that it rests on top of the game board and against the glued-on one-by-one.
6 Position the plywood piece so that the longest edge faces toward the bottom of the board, one 4-foot edge lies evenly along the game board edge and the other 4-foot edge faces toward the top of the board.
7 Lay the diagonal piece down flat. Mark screw placement along the outside of the 4-foot edge that will lie against the game board. Make the placement marks 1 inch from the edge, beginning and ending 3 inches from either end of the 4-foot length.
8 Glue the diagonally cut piece into position and attach a C-clamp at each end of the one-by-one to hold the piece into place.
9 Insert the 1-inch wood screws along the penciled-in placement marks. Remove the C-clamps.
10 Repeat steps 3-9 for the other side. Allow the wood glue to dry according to the manufacturer's instructions.
11 Paint the surface of the game board and the sides.

We accept Mastercard and Visa


mastercardvisalogo.jpg
 
Solution Graphics